How to make a smart panic alarm with Amazon Alexa


Worried that there may be an intruder in your home? The sound of a smart panic alarm going off is enough to strike fear in them and bring attention to the fact that someone knows that they’re in the house.
In this guide, I’ll show you how to build a smart panic alarm that can trigger your lights, and sound an alarm through your Sonos speakers. I’m using the free Yonomi service, which lets you trigger a string of events either via the app or voice with support for Amazon Alexa and Google Assistant.
1. Configure Yonomi
First, download and install Yonomi on your smartphone (there’s Yonomi for iOS and Yonomi for Android). When you launch the app for the first time, you’ll be prompted to create a new username and password.
Once done, Yonomi will scan your home network for supported devices, connecting any it finds automatically – including Belkin WeMo switches (listed on our best smart plugs guide) and Sonos music players. You can repeat this process manually by tapping the hamburger menu and selecting Find New Devices.
Some devices require you to link your account, including Nest thermostats and Philips Hue bulbs. To do this, select the hamburger menu and tap Accounts & Hubs, then tap the ‘+’ button. Next, select your account and follow the on-screen instructions. A full list of supported devices is available in the app: go to the hamburger menu and tap Supported Devices.

2. Configure Sonos
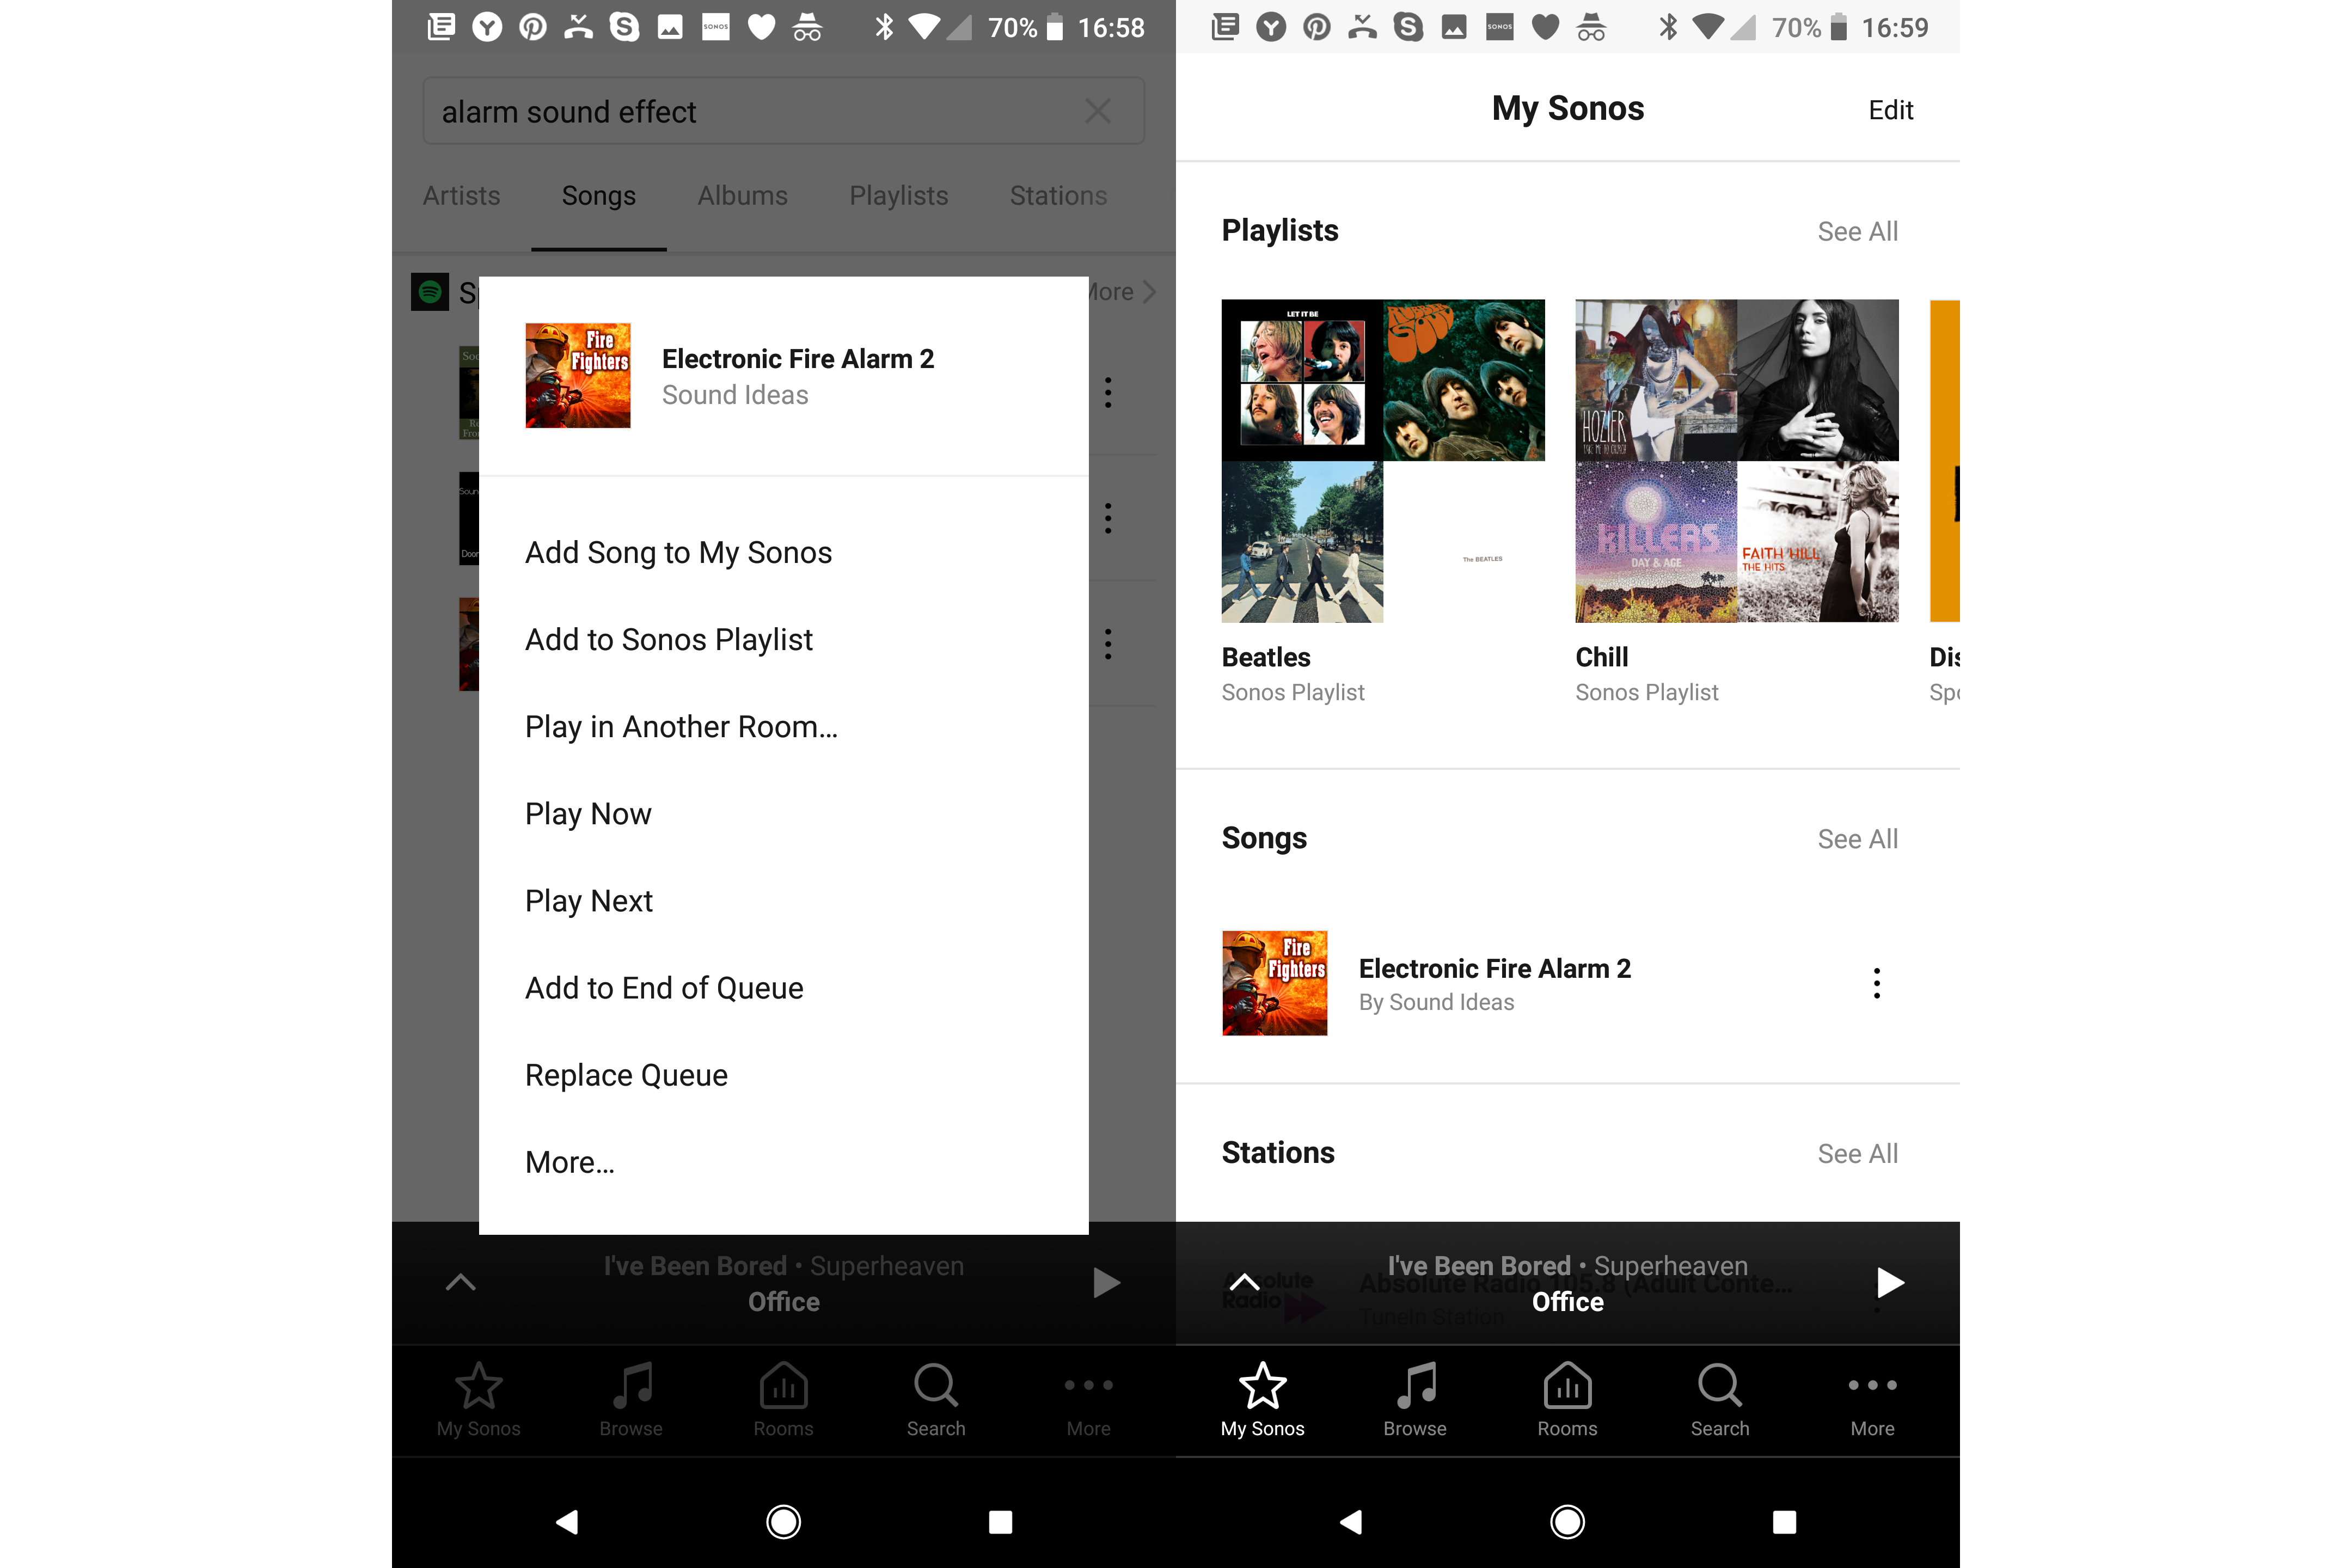
I’m using my Sonos player to play an alarm sound via Spotify. Annoyingly, Yonomi can’t tell Sonos to play a particular track, so we have to add the track we want to Favorites (My Sonos). Open the Sonos app and use the search facility to look for ‘alarm sound effect’. Find the track you want (I picked Electronic Fire Alarm 2 from Spotify) and tap the vertical row of dots and select Add Song to My Sonos. Tap the My Sonos option, and you should see your track listed.
Related: Sonos setup guide
3. Refresh Yonomi
Yonomi needs to be refreshed to work. Go back to the app and tap Things, then pull down on the list until you see the refresh icon. Once this icon disappears, tap a Sonos player and tap Favorite at the top. You should see your favourite track listed.
4. Create a Yonomi routine
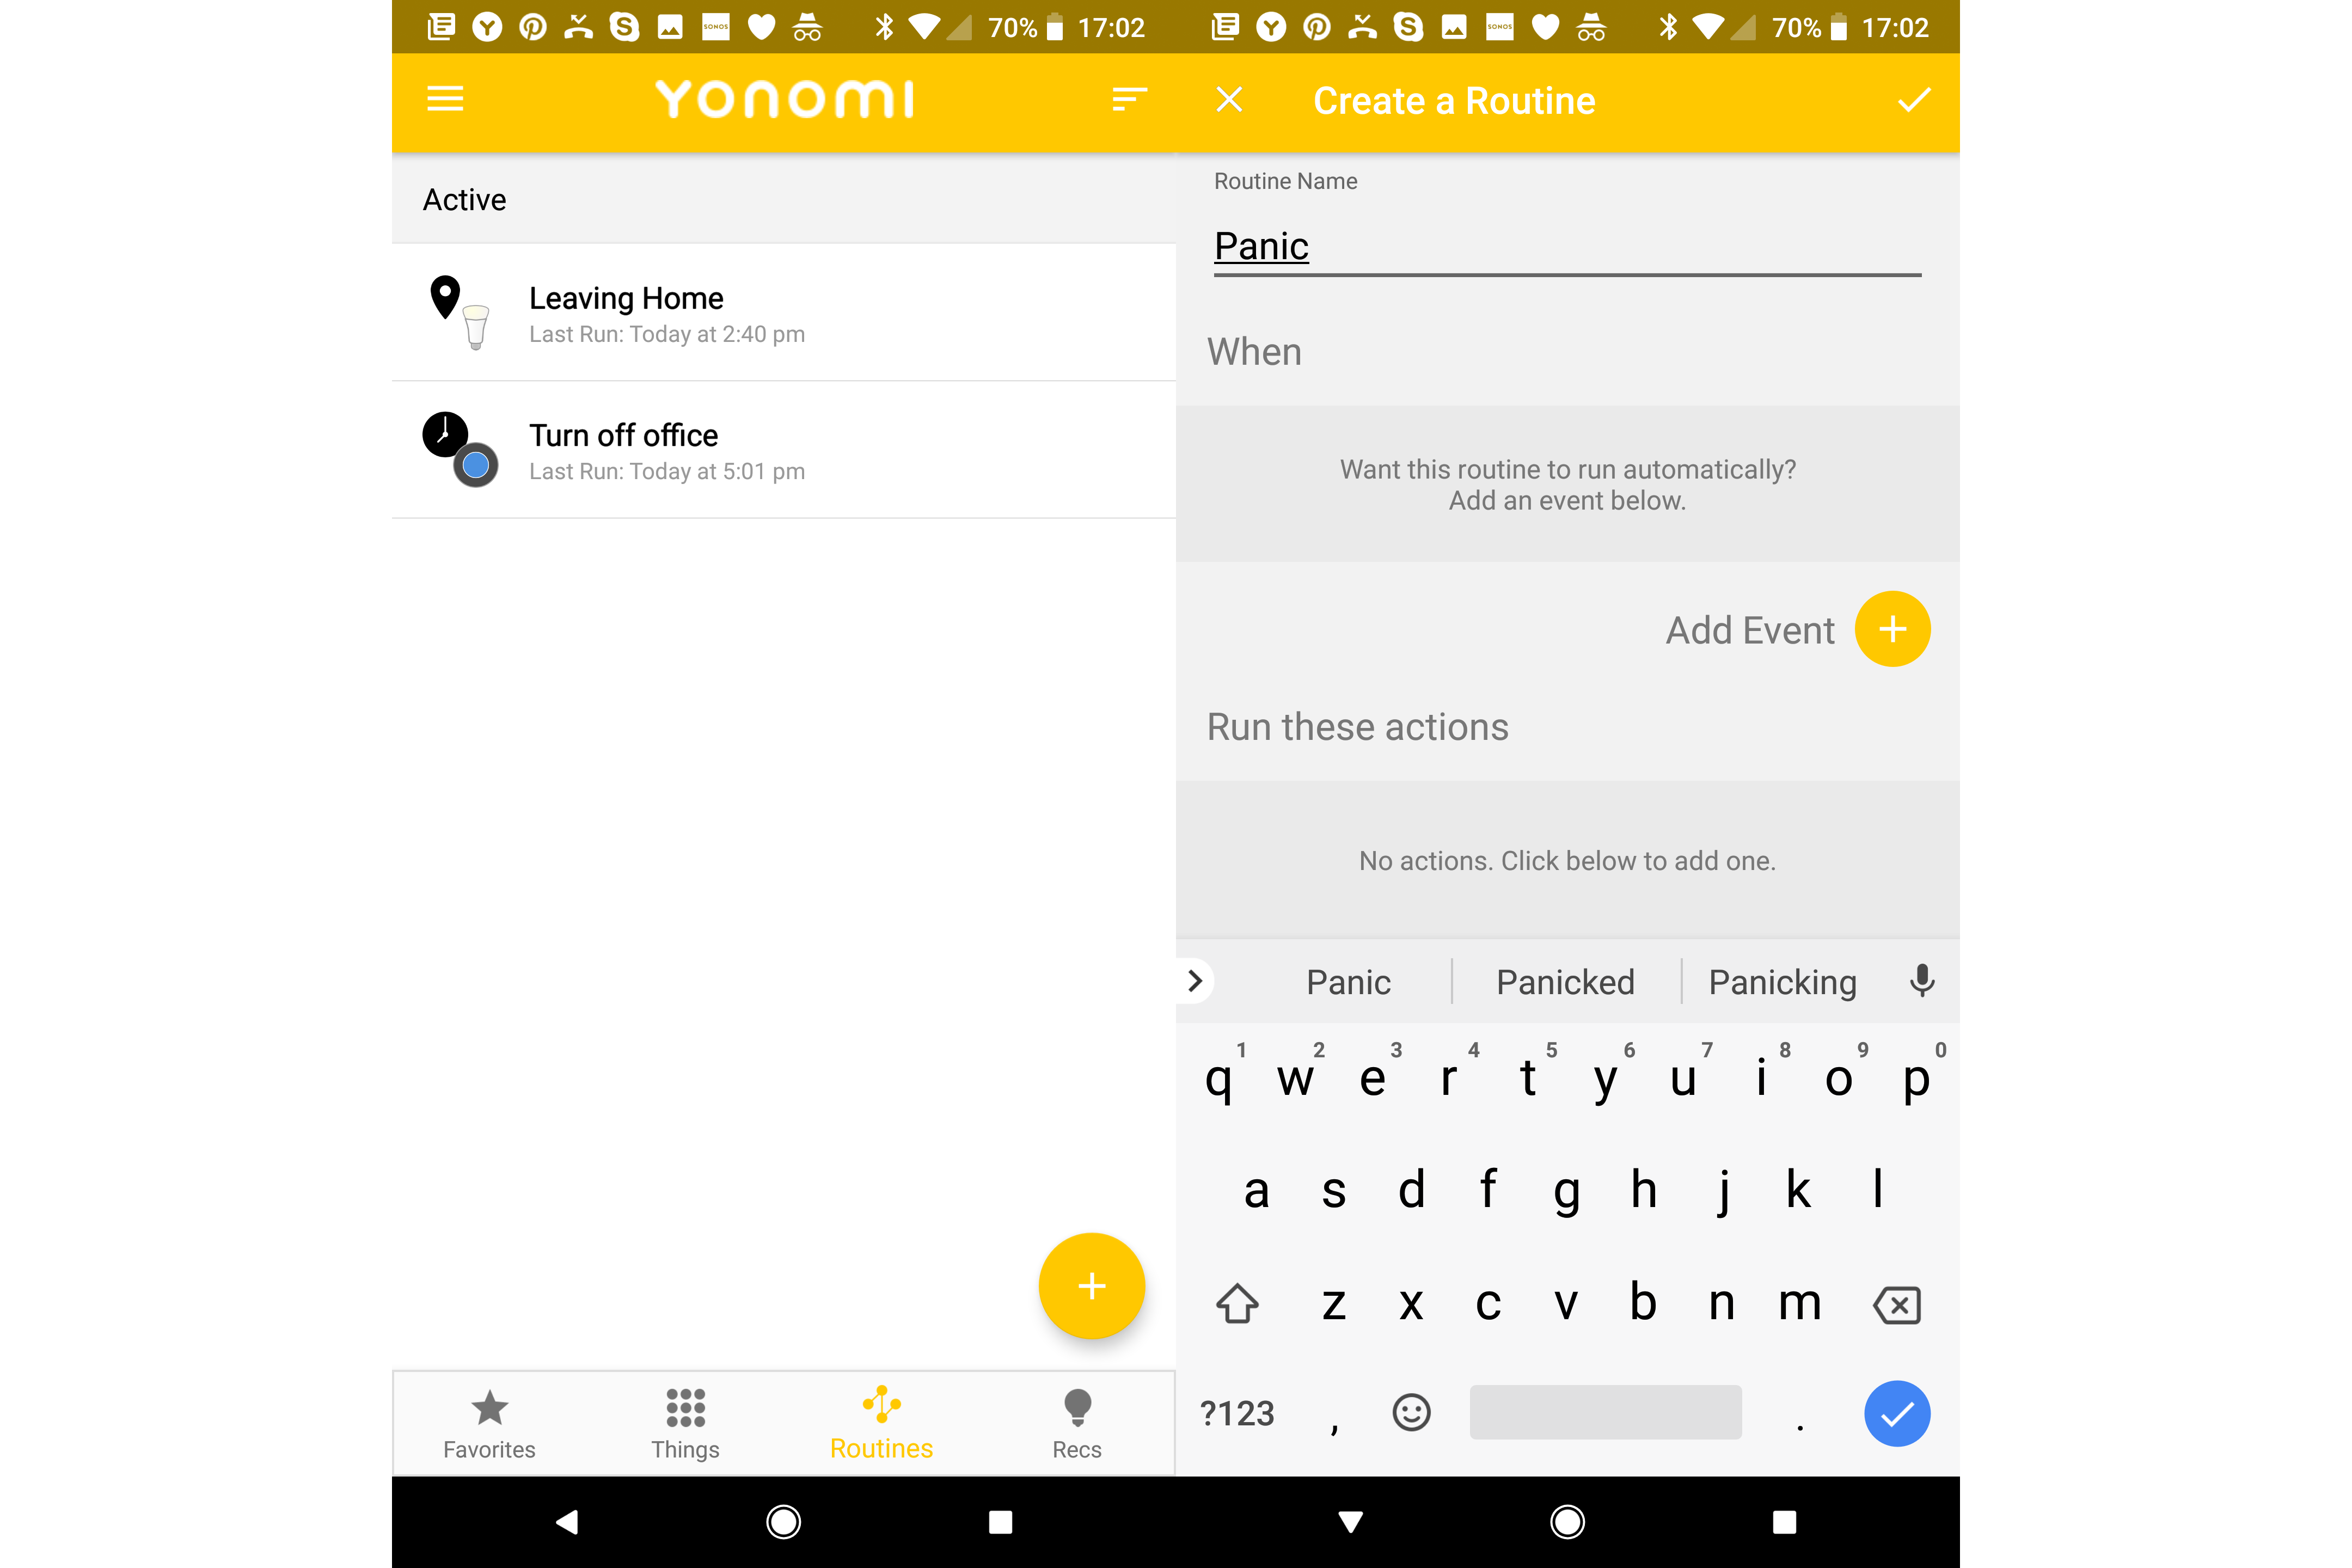
With everything in place, it’s time to create the routine. Tap routines and select the Plus icon, then enter a name for your new Routine. I went with ‘Panic’, but you can use any name you like. You don’t need an Event to trigger the action (this will be done manually in an emergency). Instead, I’ll show you how to create the Actions you need.
5. Create a Sonos action
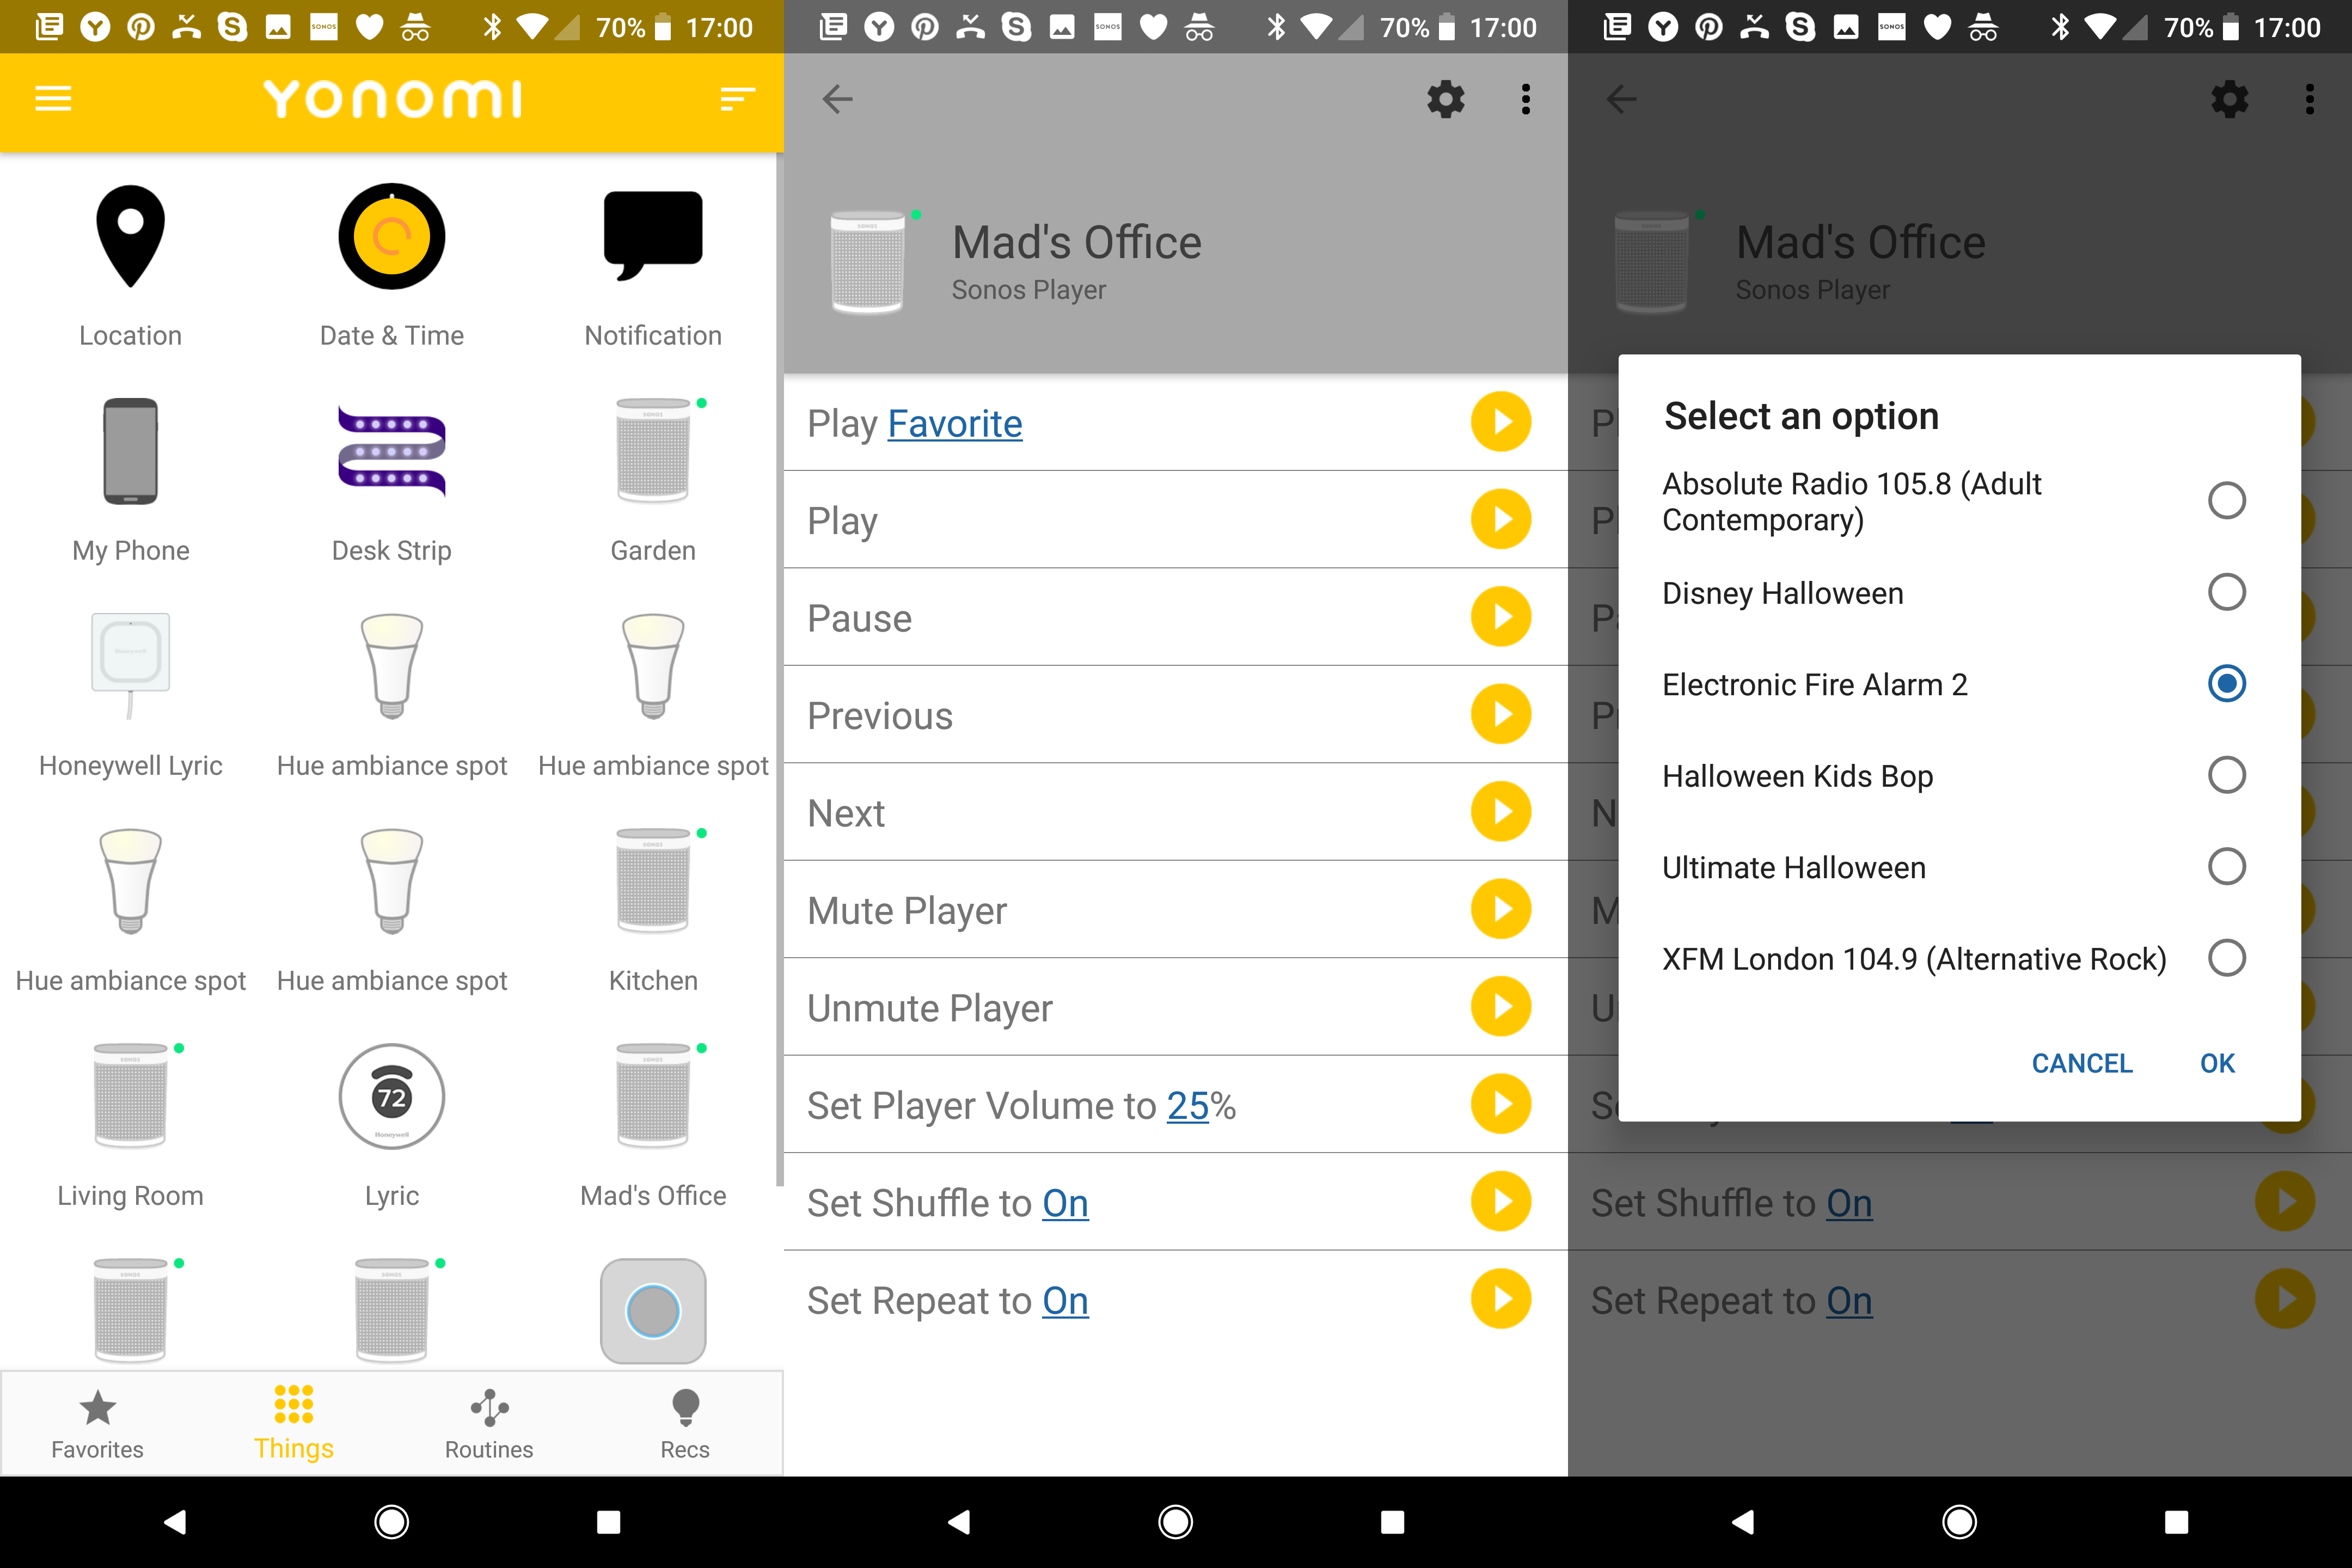
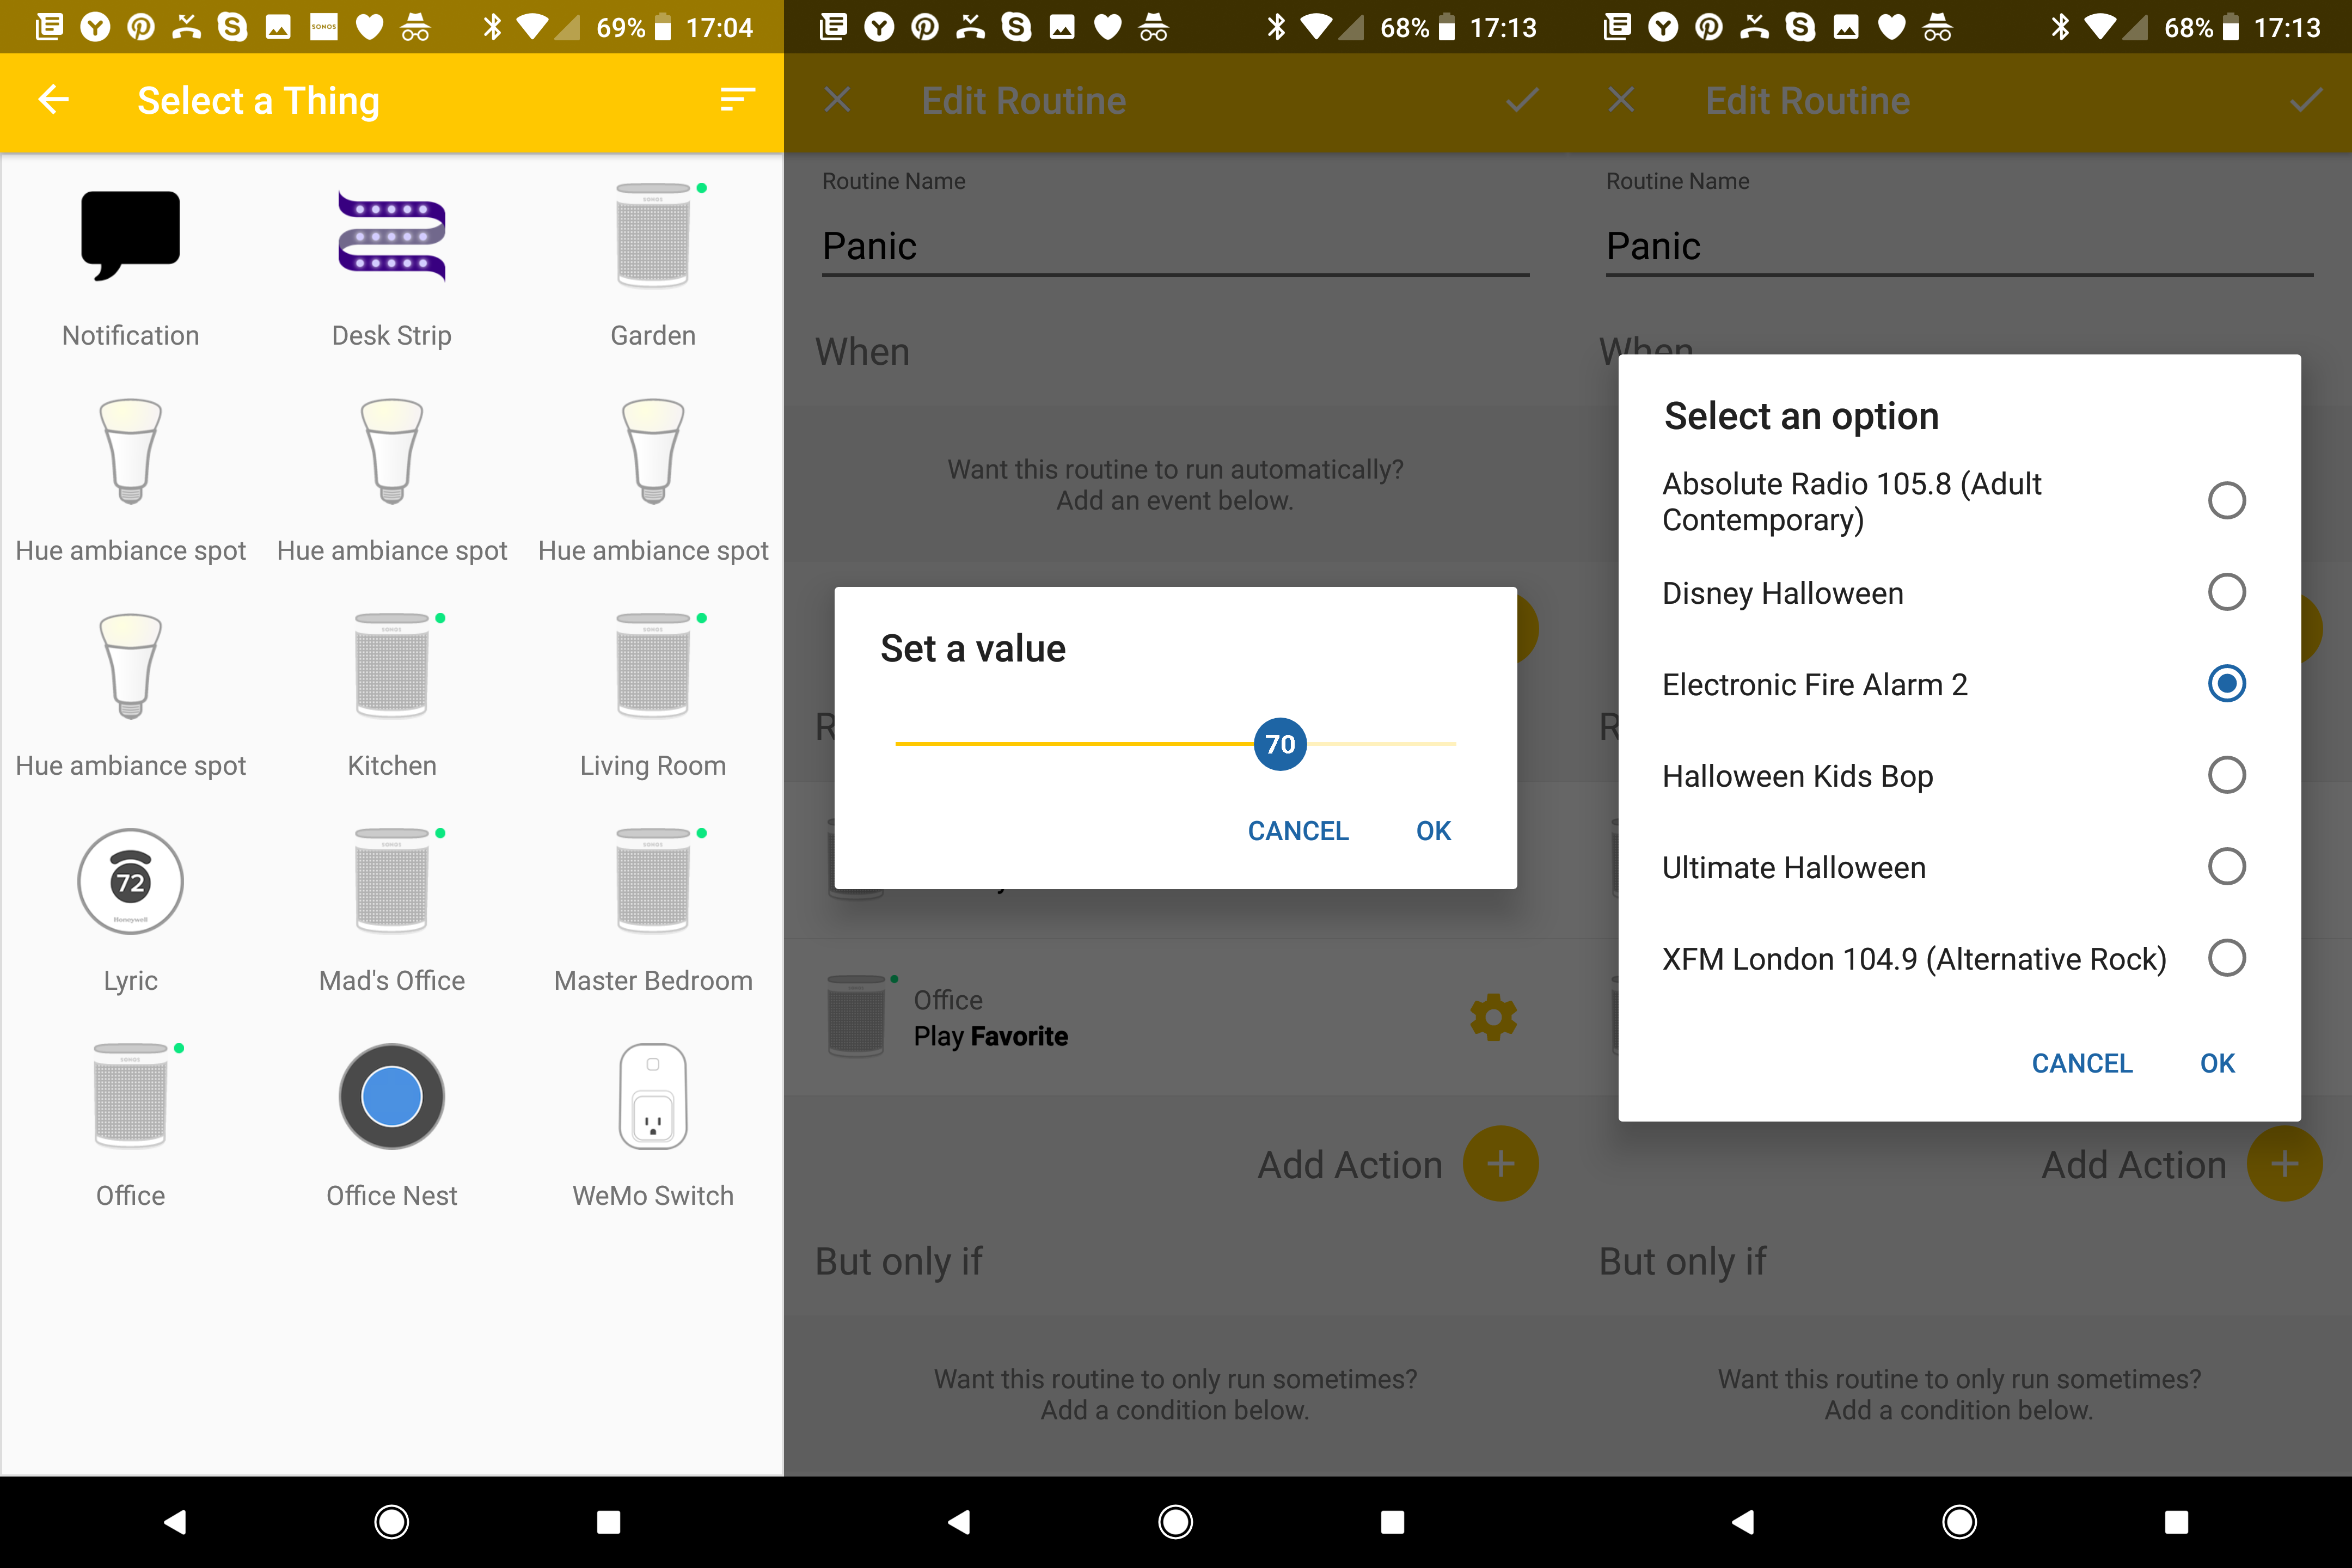
Tap the Add action button and then select a Sonos player from the list; choose Set player volume to 25%. On the next screen, you can tap the action and change the setting to a more appropriate level for an alarm. Tap Add Action, choose the same Sonos player and select Play Favorite. You’ll now see your Sonos player listed under Actions. Tap it and you’ll get a choice of your favourite tracks: tap the alarm sound you created in step 2, and tap OK. Repeat until you’ve added every Sonos player you want to use.
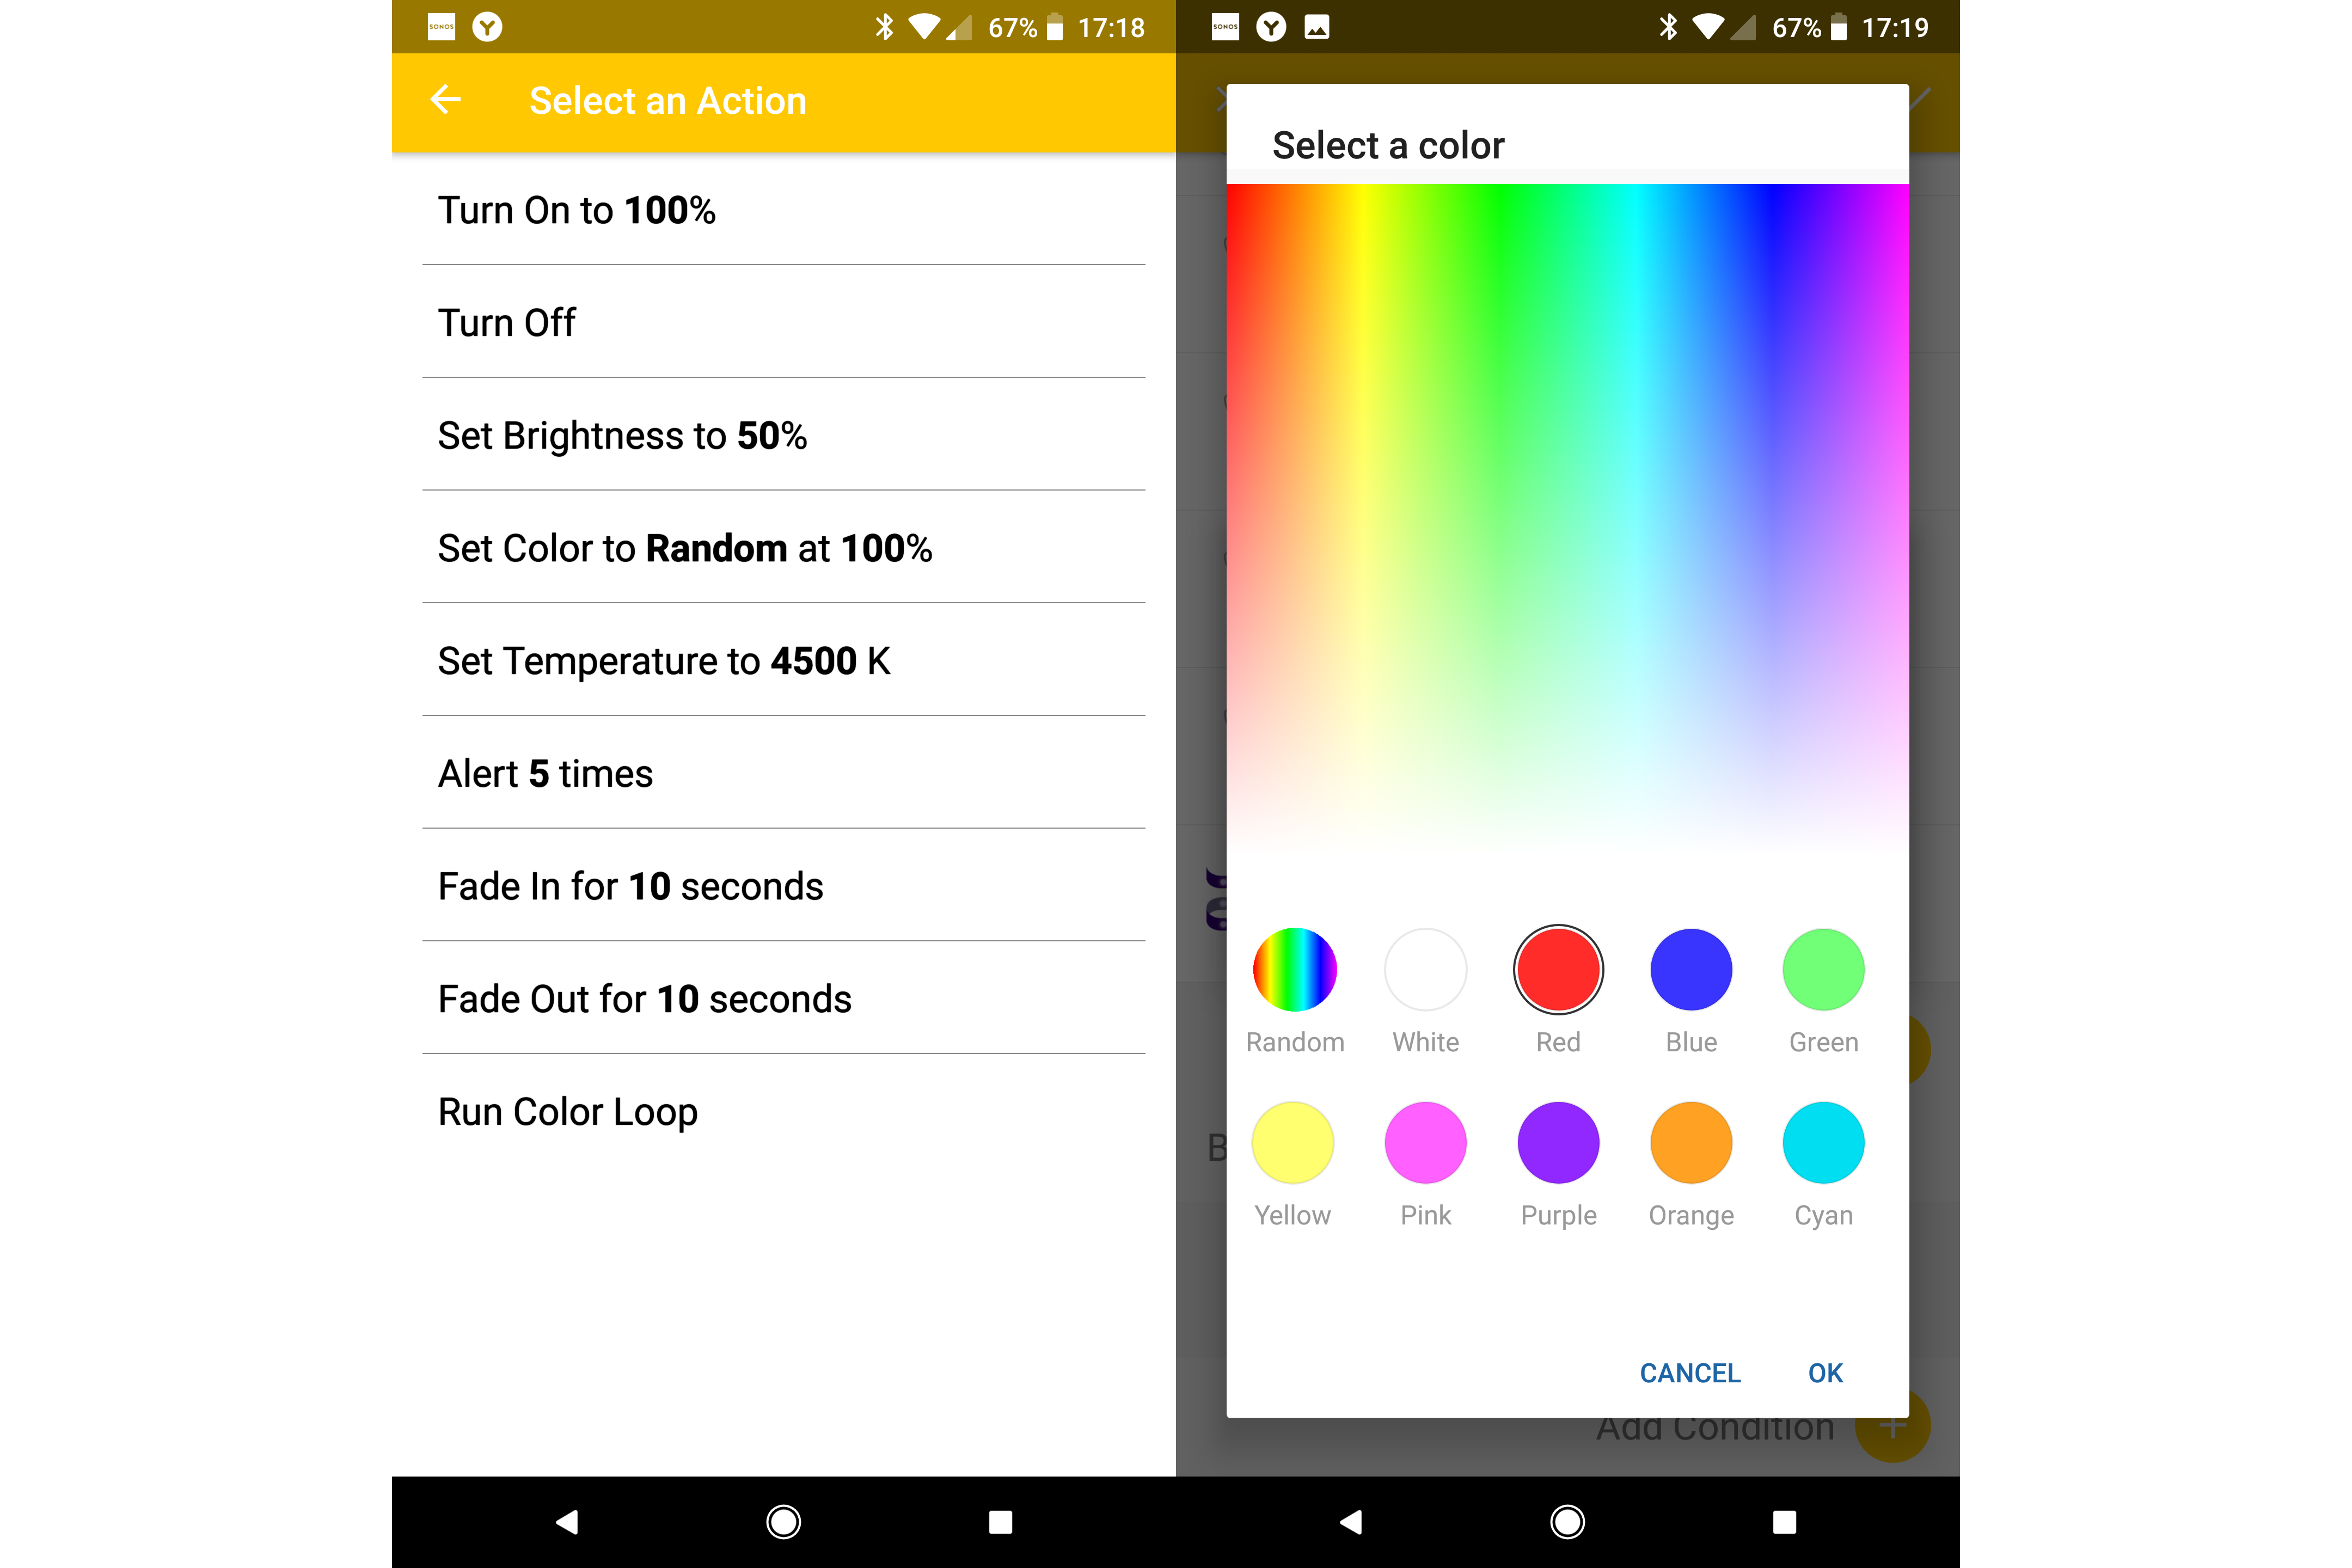
6. Create the light actions you want
Next, tap Add Action and select a light device: this can be a bulb, such as a LIFX Mini or Philips Hue bulb, or a smart plug such as the WeMo Switch. The terminology differs between products, but select the Turn On to 100% or Turn On option. Repeat for all the lights and smart plugs that you want to control.
Related: Best smart plugs
For coloured light bulbs, you can add an action to Set Color to Random at 100%. One the Routines screen, you can then pick the colour and brightness that you want.
For all light bulbs and smart plugs, you can blink your chosen light using the Alert X times or Blink X times option – this turns your selected light on and off repeatedly. Back on the Routines screen, you can tap your action and change the number of times for which a light should blink. Be careful of this last option, since the blink runs on one light at a time, so it can hold up your Routine from running. You may only want one blinking light, if at all. Tap the tick to create your Routine.
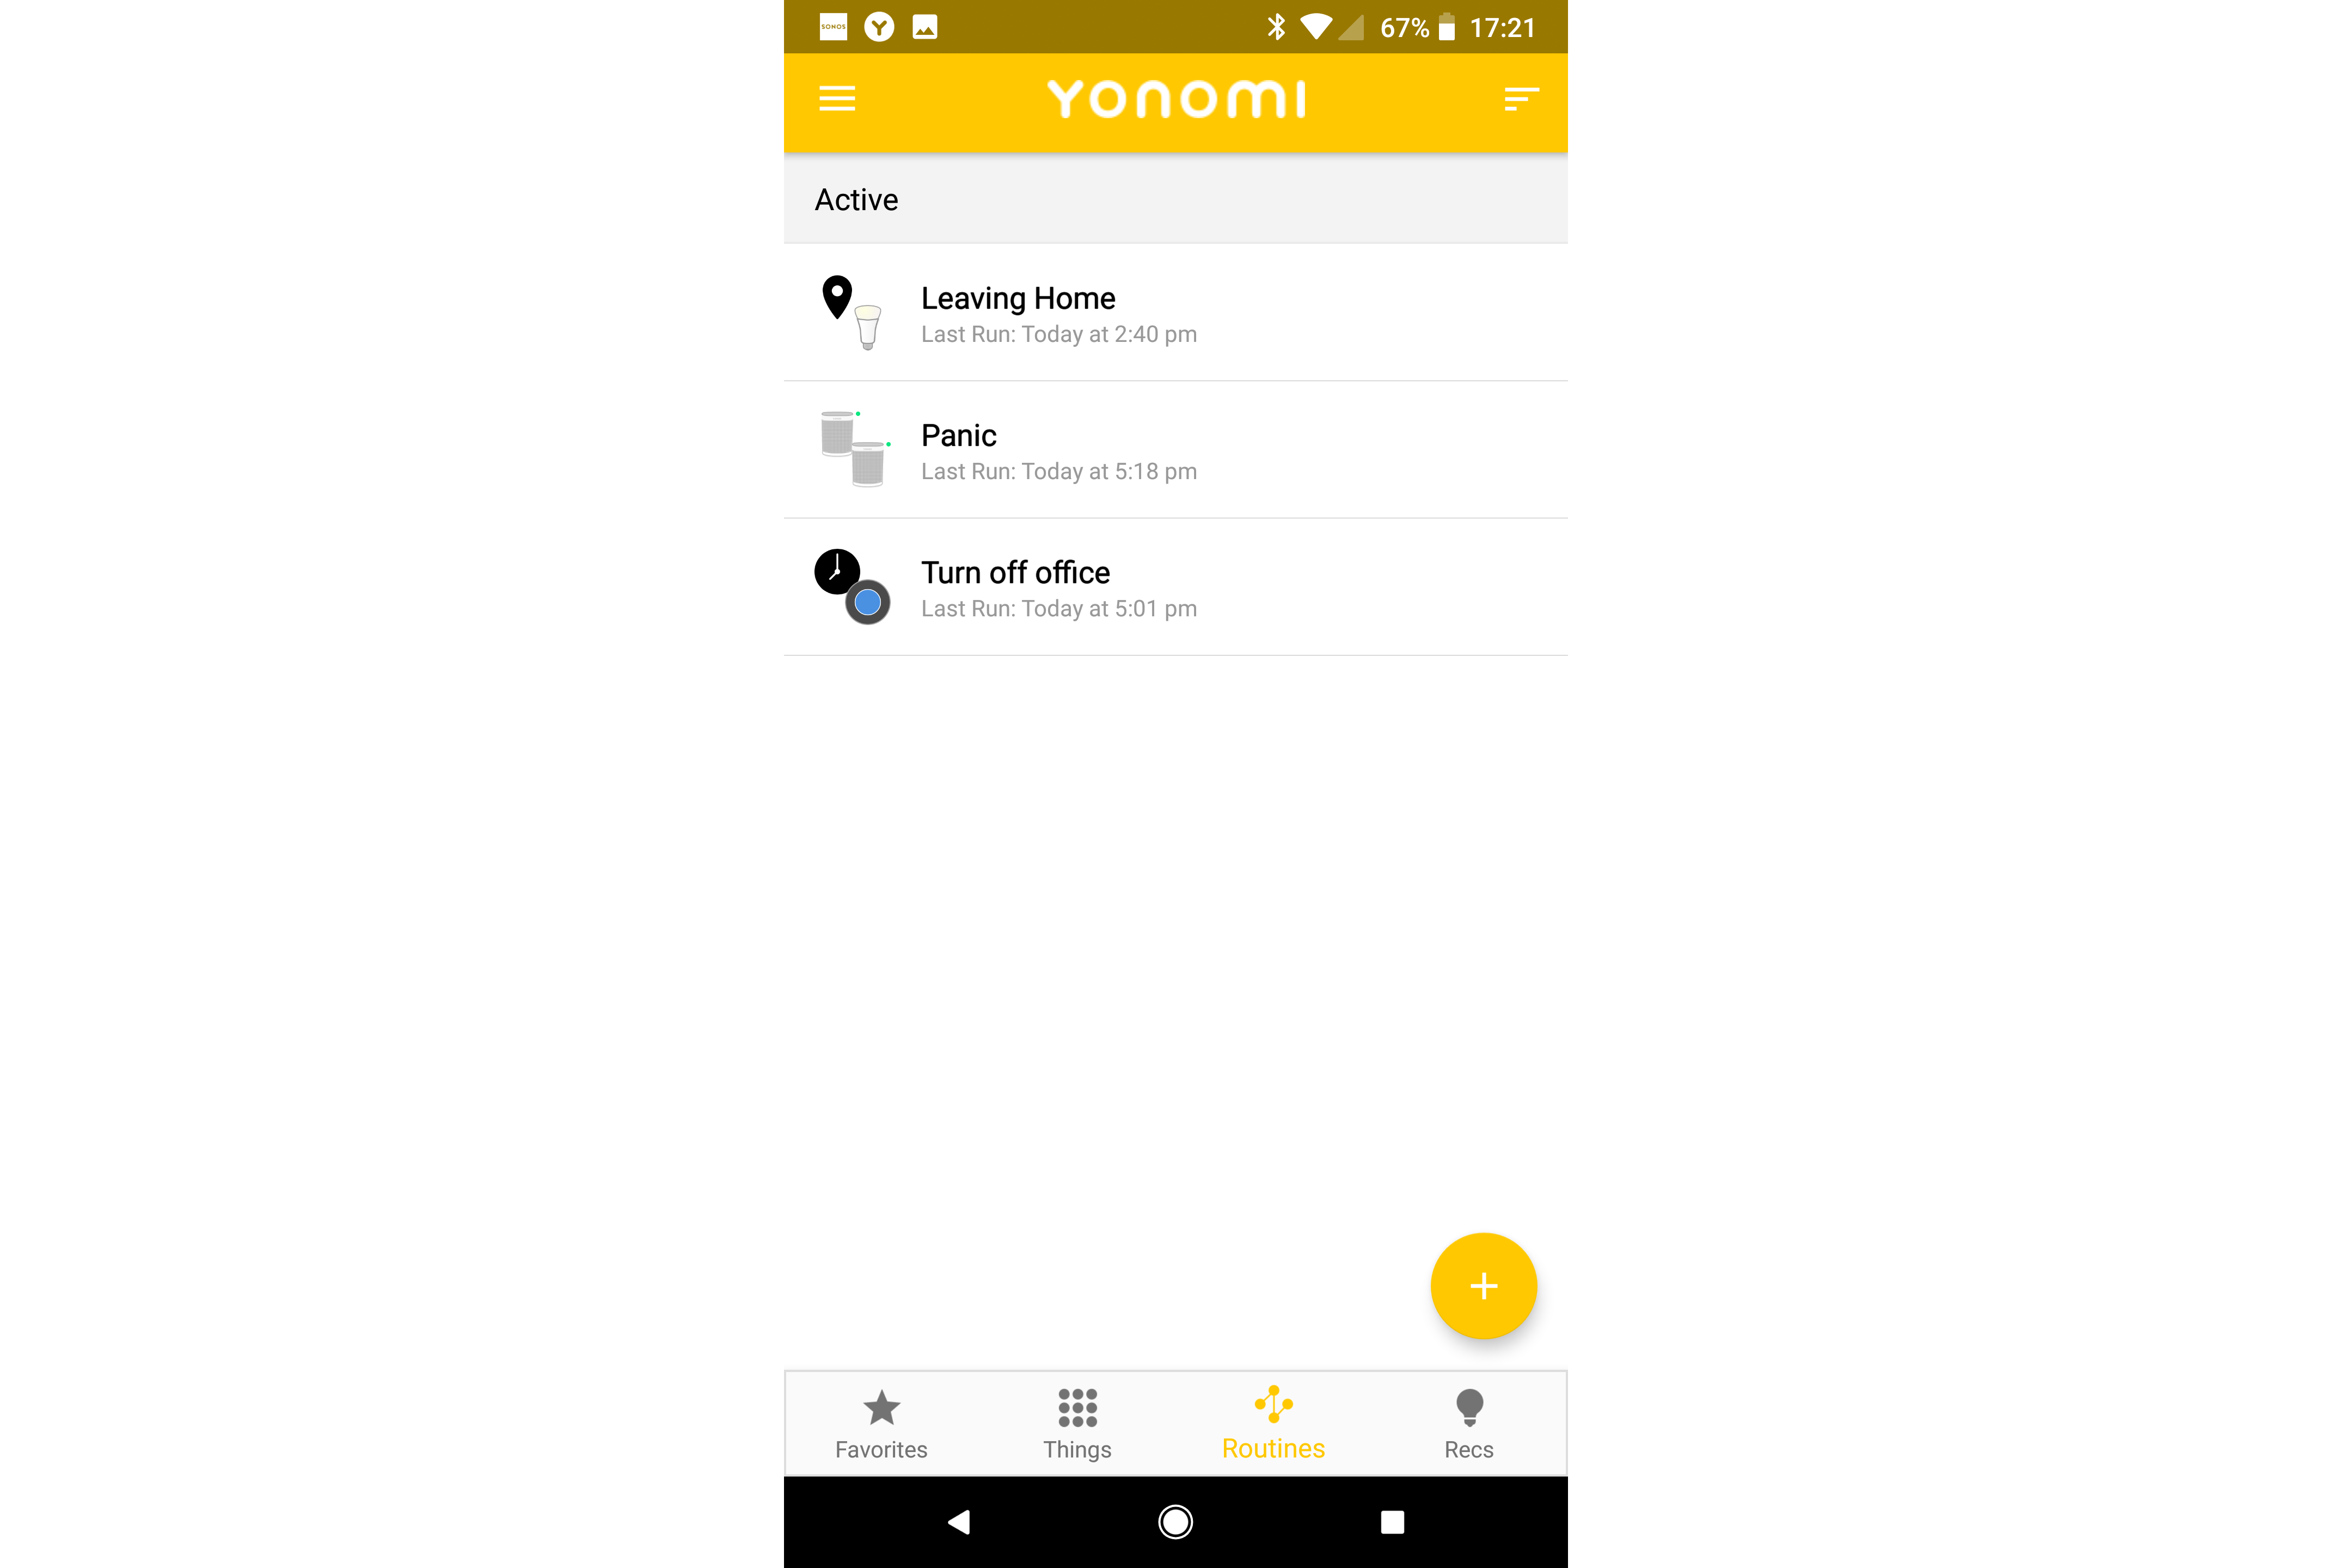
7. Running your Routine
In the Yonomi app, tap Routines, then tap your routine. Tap the Play button at the bottom and the routine will start. I found that, on occasion, the Sonos element was slightly delayed, with the lights turning on first.
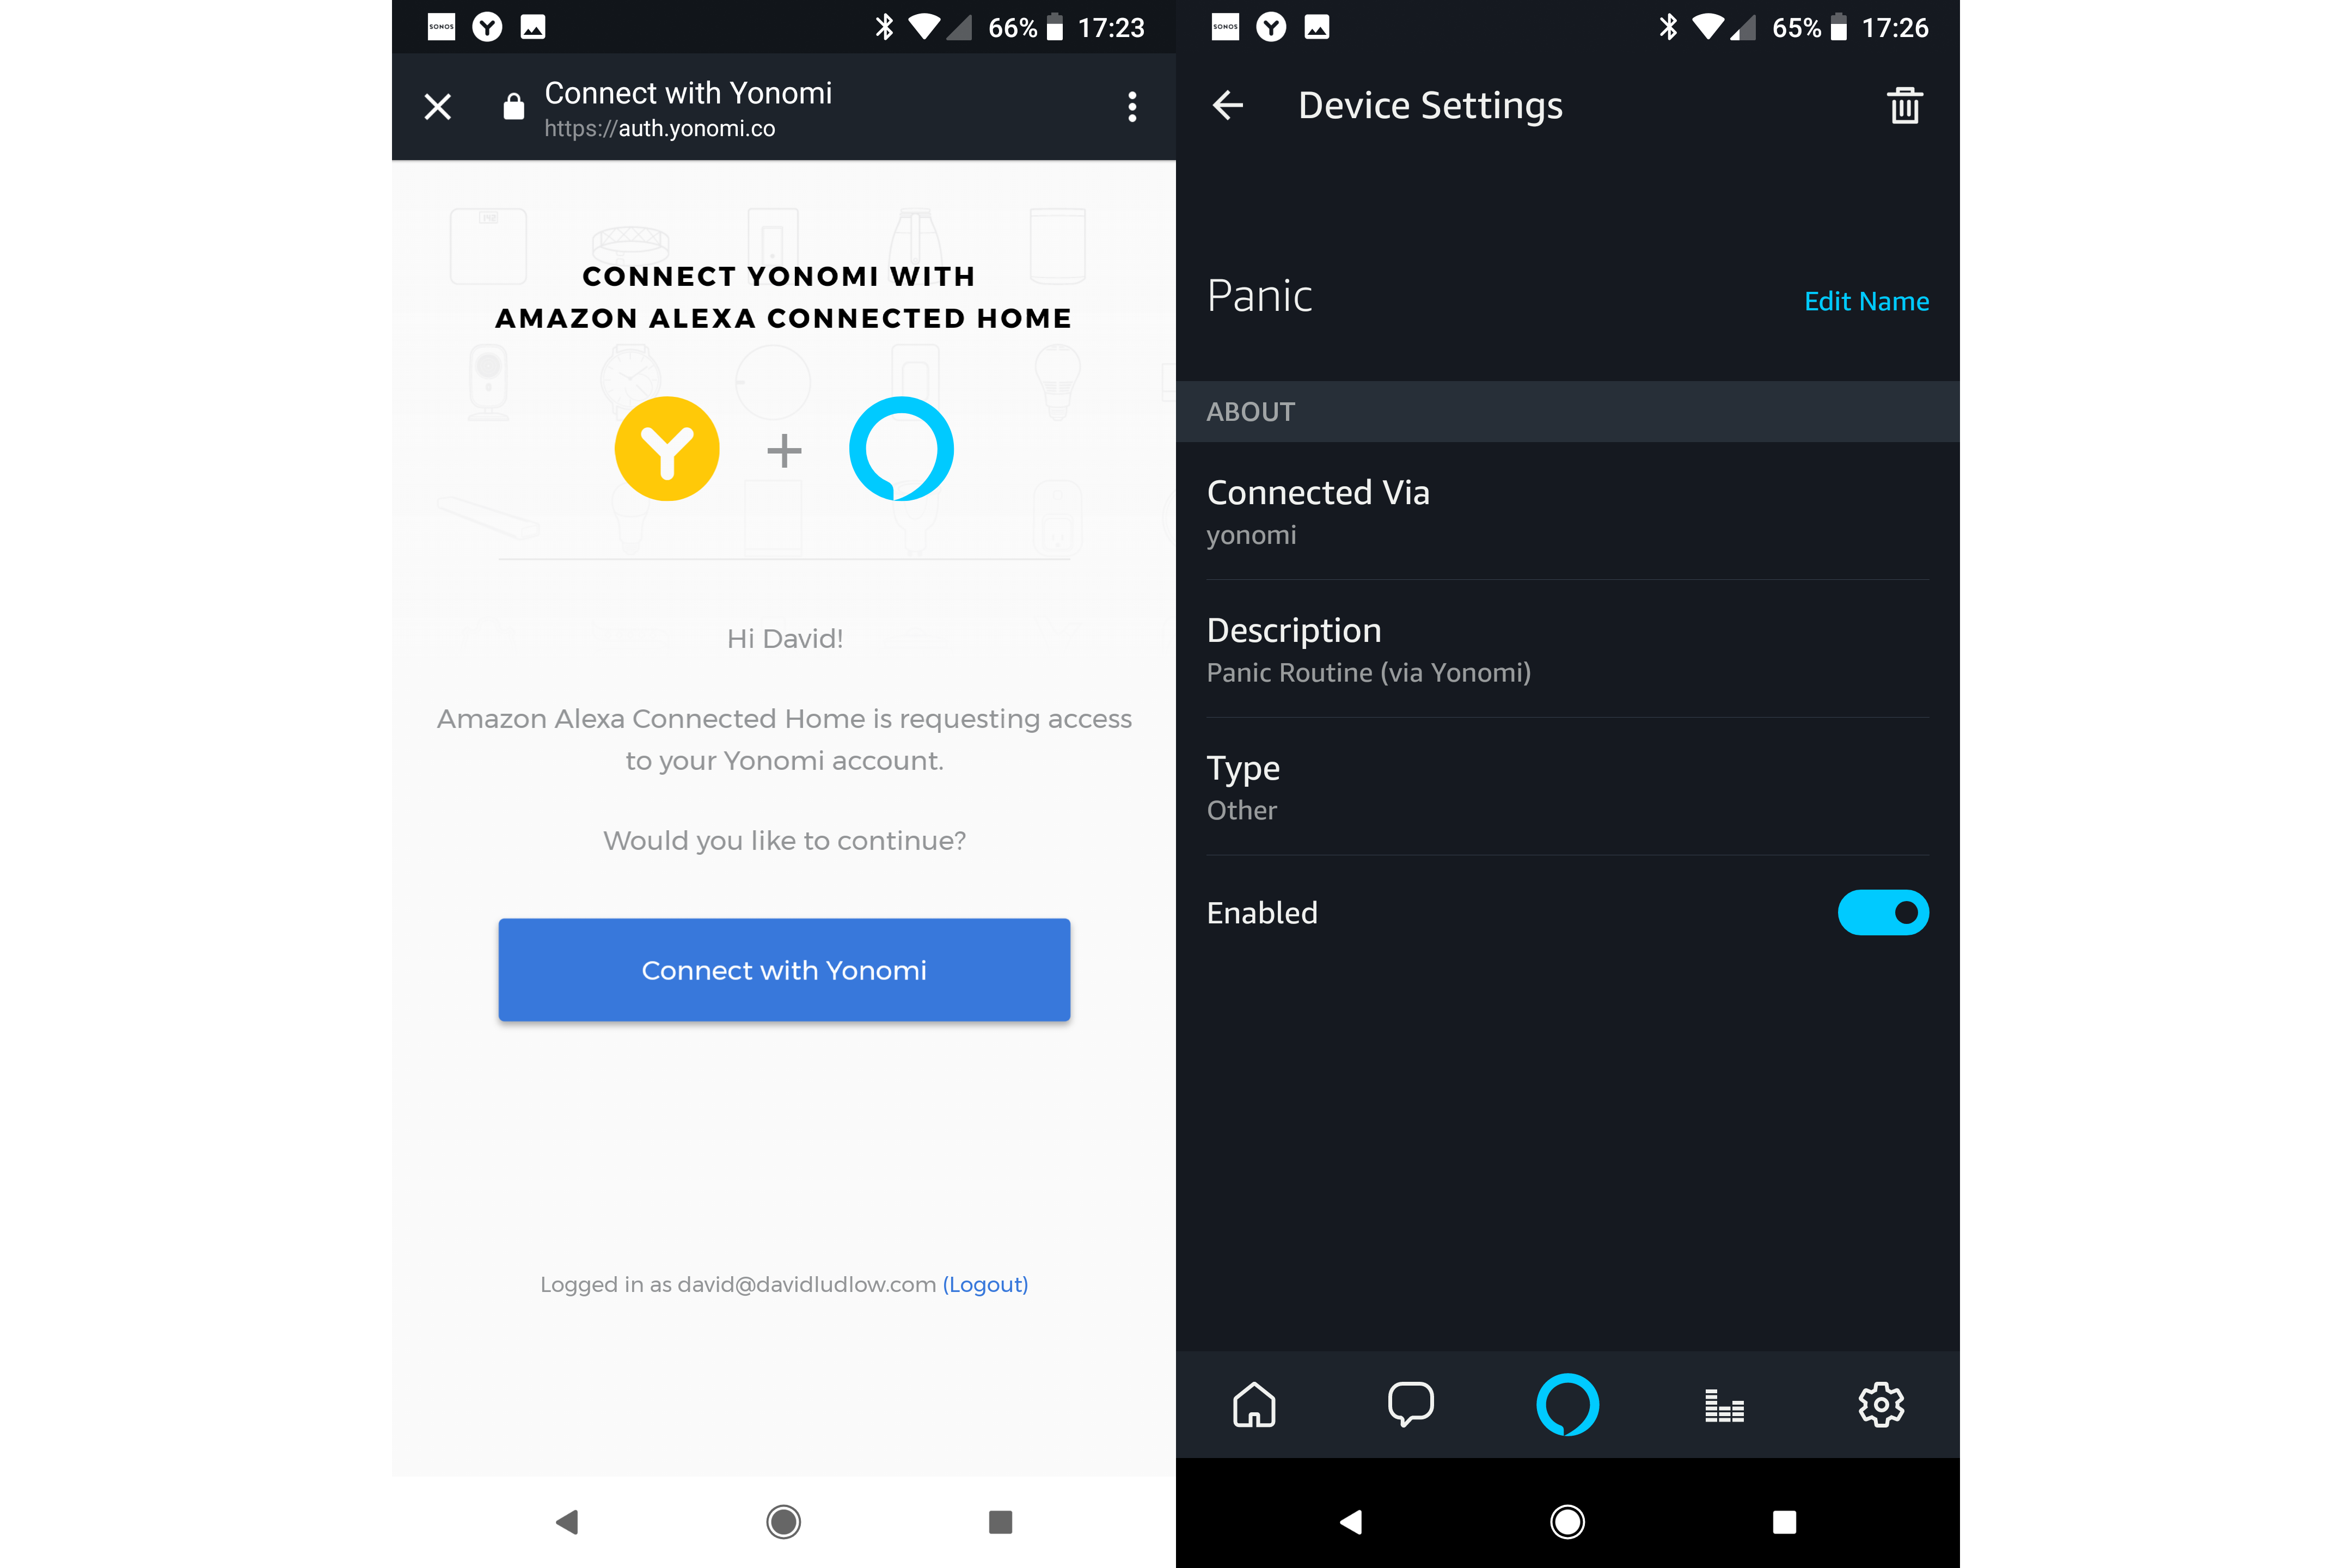
8. Run your routine using Alexa
To run your routine from an Echo, open the Alexa app. Tap the hamburger menu and select Skills. Search for Yonomi and add the Skill – you’ll need to enter your username and password.
Alexa will then discover the Routines in Yonomi. To activate just say, “Alexa, turn on <Routine name>.”
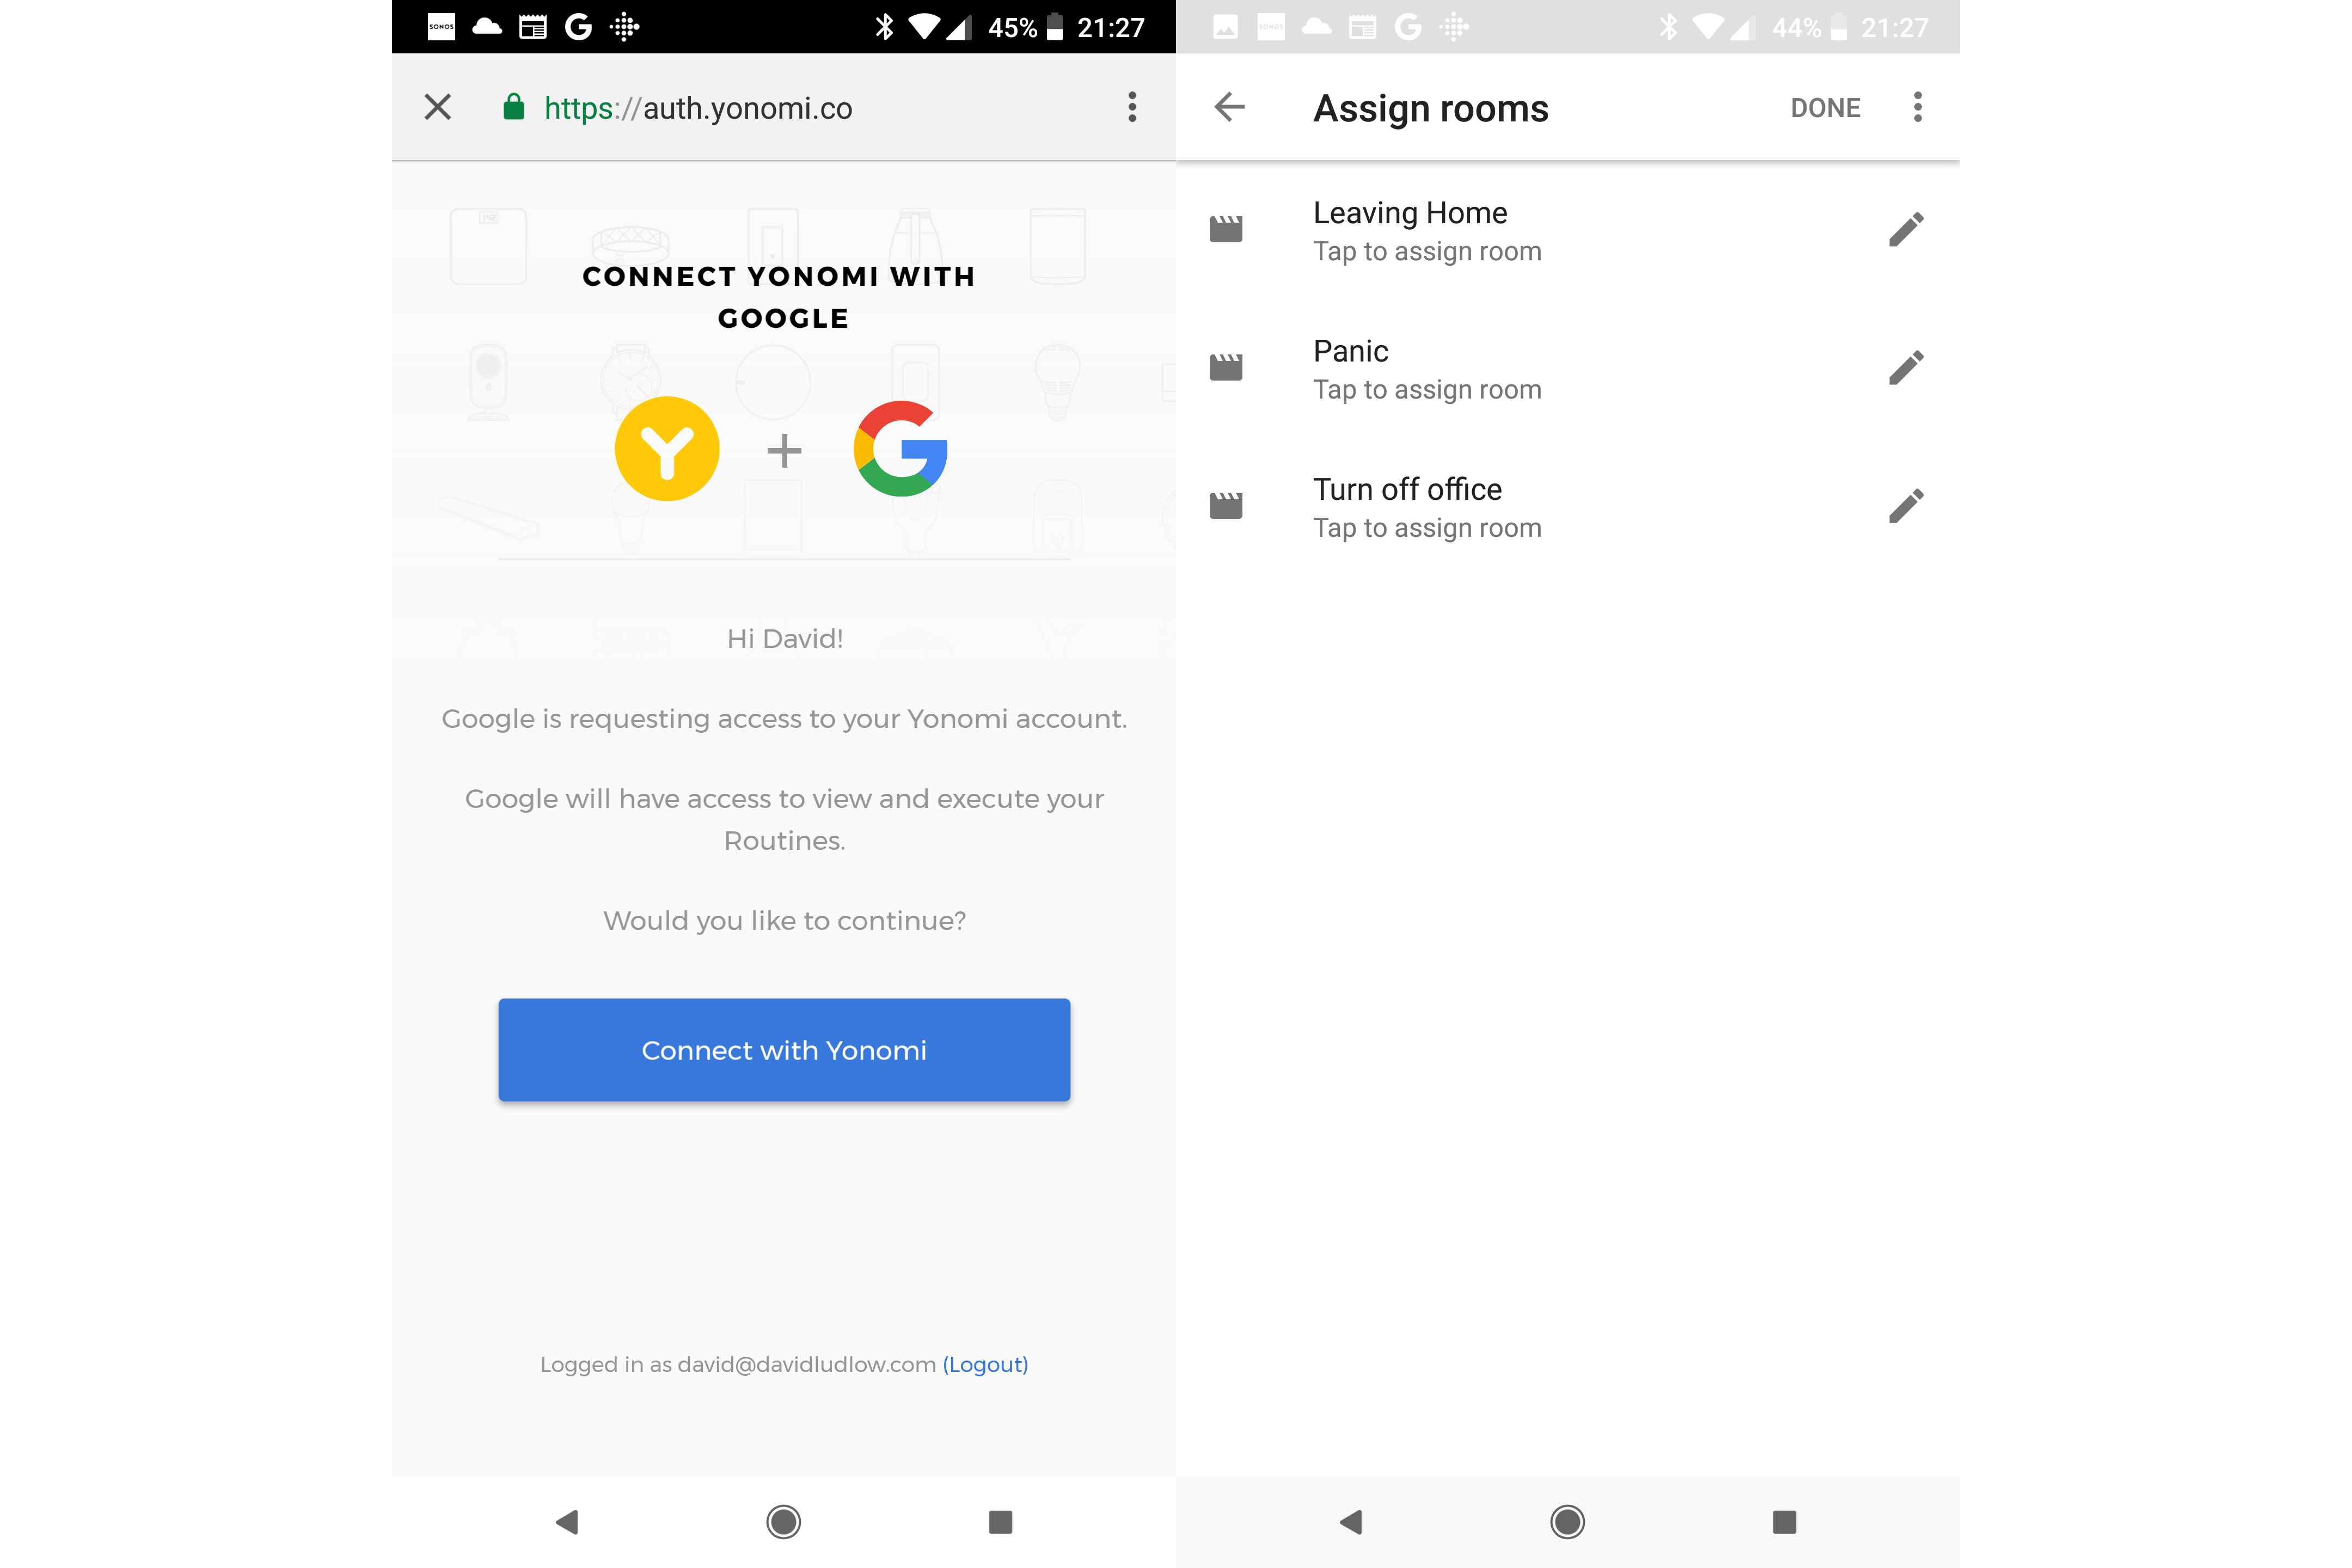
9. Run your routine using the Google Assistant
To run your routine from a Google Home, open the Home app on your phone. Tap the hamburger menu and select Home Control. Tap the ‘+’ icon and select Yonomi, then log into your account. Google will find your Routines, which you can assign to a room if you like.
To activate just say, “OK Google, turn on <Routine name>.”
Editorial independence
Editorial independence means being able to give an unbiased verdict about a product or company, with the avoidance of conflicts of interest. To ensure this is possible, every member of the editorial staff follows a clear code of conduct.
Professional conduct
We also expect our journalists to follow clear ethical standards in their work. Our staff members must strive for honesty and accuracy in everything they do. We follow the IPSO Editors’ code of practice to underpin these standards.